
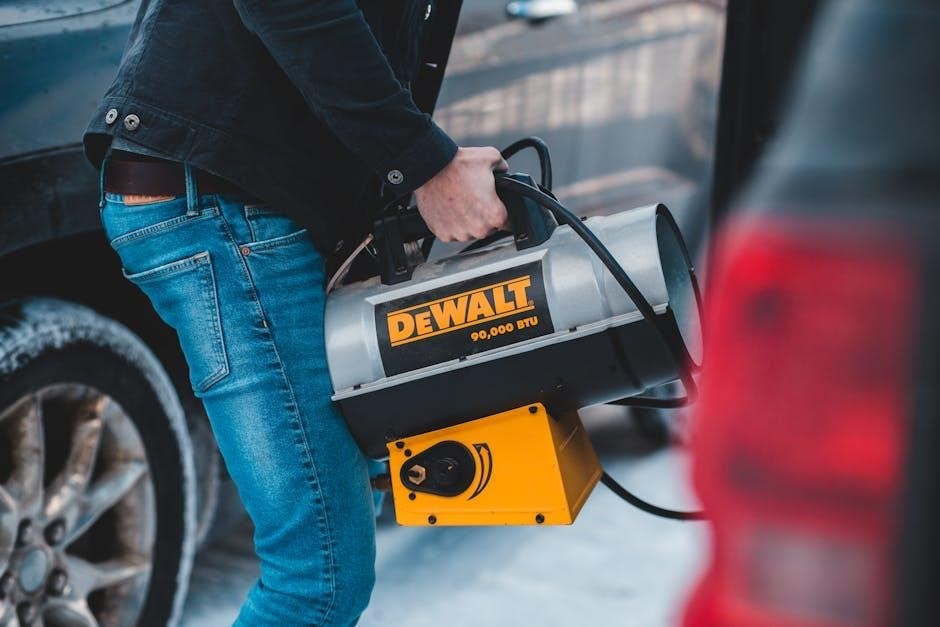
The Stanley FatMax 1200 Jump Starter is a versatile power station, offering 1200 peak amps for vehicle jump-starts and convenient 120 PSI air compressor functionality.
This digital power station, detailed in manuals available since 2024, combines power with portability, featuring USB-A and USB-C ports for device charging.
Its robust design and safety features, highlighted in online discussions and official documentation, make it a reliable tool for automotive emergencies and on-the-go inflation.
Overview of the Jump Starter
The Stanley FatMax 1200 Jump Starter, as detailed in recent manuals (dated as late as January 28, 2026), is a portable power solution designed for a variety of applications. Primarily, it’s engineered to jump-start vehicles with a 12-volt system, delivering up to 1200 peak amps.
Beyond jump-starting, this unit incorporates a built-in 120 PSI air compressor, adding utility for inflating tires, sports equipment, and more. The integrated digital display provides crucial information, including battery status, voltage, and alarm indicators.
Safety is paramount, with warnings against using it for anything other than starter-motor applications, and emphasizing the dangers of working near lead-acid batteries.
Key Features and Specifications
The Stanley FatMax 1200 boasts a 1200 peak amp jump-starting capability, suitable for most passenger vehicles. It features a 120 PSI air compressor for convenient tire inflation. Powering devices is possible via integrated USB-A and USB-C ports, offering 15 watts of output.
Key features include a digital display showing battery status, voltage, and alarm indicators. A warning system alerts users with a 2-second tone every 10 seconds when the power switch is on, but clamps aren’t connected.
This unit is designed for 12V systems only and comes with robust clamps and cables for reliable connections.

Safety Precautions
Always read the manual before use; batteries generate explosive gases. Avoid supplying power to low-voltage systems beyond starter-motor applications to prevent injury.
Battery Safety Guidelines
Working near lead-acid batteries presents significant hazards. These batteries release flammable and explosive hydrogen gas during charging and normal operation, necessitating extreme caution. Ensure adequate ventilation is present when jump-starting or charging.
Never smoke or allow sparks or flames in the vicinity of the battery. Always wear appropriate eye protection and gloves to shield against acid splashes. Disconnect jewelry, as metal can cause short circuits.
If battery acid contacts skin or eyes, immediately flush with clean water and seek medical attention. Refer to the instruction manual for detailed safety procedures and warnings regarding battery handling.
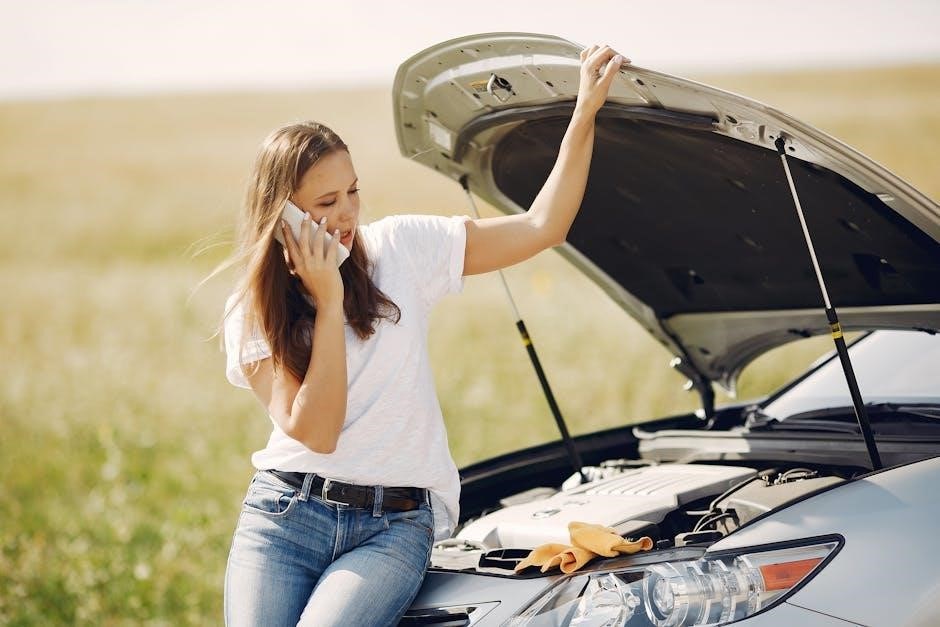
Jump Starting Safety Rules
Prior to jump-starting, ensure both vehicles are turned off and not touching each other. Verify the battery voltages are the same (typically 12V). Connect the red clamp to the positive (+) terminal of the dead battery, then the other red clamp to the positive terminal of the good battery.
Next, connect the black clamp to the negative (-) terminal of the good battery, and finally, the other black clamp to a grounded metal surface on the disabled vehicle – not the negative terminal.
Start the good vehicle and let it run for a few minutes before attempting to start the dead vehicle.
General Safety Warnings
Working near lead-acid batteries is hazardous. Batteries release explosive gases during operation; therefore, meticulously follow all instructions in this manual before each use. Avoid creating sparks or flames in the vicinity of the battery.
Never attempt to jump-start a damaged battery. Always wear eye protection and gloves. Ensure the jump starter is disconnected from the vehicle immediately after a successful jump-start.
Do not use the jump starter for any application other than starting a vehicle’s engine. Misuse can result in electrical shock or injury.

Components and Features
The Stanley FatMax 1200 includes a power switch, clamps with cable connections, and a digital display showing battery status and alarm indicators for safe operation.
Jump Starter Power Switch
The Jump Starter Power Switch controls the unit’s operational state. When switched ON with clamps disconnected, a two-second warning sound repeats every ten seconds, alerting the user to the unconnected state.
The LCD screen simultaneously displays crucial information: the Battery Status Icon, Battery Voltage Indicator, Clamp Icons, and negative (-) signs. Additionally, both the Alarm Icon and Jump Starter Icon will flash, visually confirming the readiness for connection.
This feature ensures the user is aware of the system’s status and prevents accidental discharge.
Clamps and Cable Connections
The Stanley FatMax’s clamps and cables are critical for safe and effective jump-starting. Ensure a secure connection to the vehicle’s battery terminals – red clamp to positive (+), and black clamp to negative (-).
Prior to connection, verify the cables are free from damage, and the clamps exhibit a firm grip. Improper connections can lead to sparks or failure to start.
Always connect the clamps in the specified order to minimize risk, as detailed in the instruction manual, and avoid contact between the clamps themselves.
Digital Display and Indicators
The Stanley FatMax’s digital display provides crucial information regarding the unit’s status. The LCD screen showcases the Battery Status Icon, indicating charge level, alongside the Battery Voltage Indicator for precise readings.
When clamps aren’t connected, a warning sound activates every ten seconds, accompanied by flashing Clamp Icons and negative signs.
The Alarm Icon alerts to potential issues, while the Jump Starter Icon confirms readiness. Understanding these indicators, as outlined in the manual, ensures safe and informed operation.

Operating Instructions: Jump Starting
To jump-start a vehicle, connect the clamps correctly – red to positive, black to ground – ensuring a secure connection before activating the jump starter’s power switch.
Connecting the Jump Starter to a Vehicle
Before connecting, ensure the vehicle is in Park or Neutral with the ignition off. Identify the positive (+) and negative (-) terminals on the vehicle’s battery; these are usually marked. Attach the red clamp to the positive terminal first, then the black clamp to a clean, unpainted metal surface on the vehicle’s chassis, away from the battery.
Double-check that the connections are secure and won’t detach during the jump-starting process. A poor connection can prevent starting or, worse, cause sparks. The jump starter will emit a warning sound if clamps aren’t connected correctly, as indicated in the instruction manual.
Avoid connecting the black clamp directly to the negative battery terminal.
Jump Starting Procedure ― Step-by-Step
First, turn the jump starter’s power switch to the “ON” position. Then, attempt to start the vehicle. If it doesn’t start immediately, wait a minute and try again. Do not crank the engine for more than 10 seconds at a time to avoid overheating.
If the vehicle still doesn’t start after several attempts, check the clamp connections and consult the troubleshooting section of the manual. Once the vehicle starts, carefully disconnect the clamps in reverse order: black first, then red.
Turn off the jump starter to conserve battery power.
Troubleshooting Jump Starting Issues
If the jump starter won’t initiate a jump, ensure the power switch is “ON” and the clamps are securely connected – a warning sound indicates improper connection. Check battery voltage; a significantly low reading suggests a discharged jump starter needing recharge.
For a non-starting vehicle, verify correct polarity (red to positive, black to negative). If issues persist, the vehicle’s battery may be severely damaged or the starter motor faulty. Consult a mechanic.
Refer to the manual for detailed error codes displayed on the digital screen.
Using the Air Compressor Feature
The Stanley FatMax 1200 includes a 120 PSI air compressor, ideal for inflating tires and sports equipment, as detailed in the user manual.
Simply connect the air hose and operate the compressor, monitoring pressure via the integrated gauge for precise inflation.
Connecting the Air Hose
To utilize the air compressor, first locate the air hose stored with the Stanley FatMax 1200 Jump Starter. Unscrew the cap protecting the air compressor outlet valve on the unit. Carefully thread the air hose connector onto this valve, ensuring a secure and airtight connection – hand tighten firmly, but avoid over-tightening which could damage the valve.
Once connected, verify the hose is firmly attached by gently tugging on it. The air hose is designed for compatibility with standard tire valves, allowing for easy inflation of car tires, bicycle tires, and various inflatable items. Always double-check the connection before operating the compressor.
Operating the Air Compressor
With the air hose securely connected, power on the Stanley FatMax 1200 Jump Starter. The air compressor is activated by pressing the designated air compressor button. The unit will begin to inflate, and the digital display will show the current air pressure. Monitor the pressure gauge closely to avoid over-inflation.
To stop the compressor, simply press the air compressor button again. The unit is designed for intermittent use; avoid continuous operation for extended periods to prevent overheating. Always disconnect the air hose when not in use.
Air Pressure Gauge and Settings
The integrated digital display prominently features an air pressure gauge, showing readings in PSI. This allows for precise inflation of tires, sports equipment, and inflatable items. While specific settings aren’t adjustable, the gauge provides real-time monitoring during compressor operation.
Refer to the recommended PSI for your specific application – typically found on the item being inflated. Avoid exceeding the maximum pressure rating of the item. Regularly check the gauge’s accuracy for optimal performance.
Understanding the Digital Display
The LCD screen displays crucial information, including battery status, voltage, and clamp connection indicators. Alarm and jump starter icons flash when clamps aren’t connected.
These visual cues, detailed in the instruction manual, ensure safe and informed operation of the power station.
Battery Status Icon
The Battery Status Icon on the digital display provides a quick visual assessment of the jump starter’s internal battery charge level. This icon dynamically changes to reflect the remaining power capacity, allowing users to understand how much jump-starting capability is available.
A full icon indicates a fully charged unit, ready for immediate use. As the battery discharges, the icon progressively empties, signaling the need for recharging. The manual emphasizes regularly checking this icon before attempting a jump start to ensure sufficient power. Ignoring this can lead to unsuccessful starts or damage to the unit.
Understanding this icon is crucial for maintaining optimal performance and extending the lifespan of the Stanley FatMax 1200 Jump Starter.
Battery Voltage Indicator
The Battery Voltage Indicator displays the current voltage of the jump starter’s internal battery. This digital readout, prominently featured on the LCD screen, provides precise information about the unit’s power condition. A healthy, fully charged unit typically shows a voltage around 12.6 volts.
Lower voltages indicate a depleted battery requiring recharging. Monitoring this indicator helps users assess the unit’s overall health and identify potential issues. The manual highlights that consistent low voltage readings suggest a possible battery malfunction, requiring professional attention.
Regularly checking this indicator ensures optimal performance.
Alarm and Jump Starter Icons
The Alarm Icon on the digital display signals potential issues, such as reverse polarity connection during jump-starting or an over-temperature condition. When activated, the icon flashes, accompanied by an audible warning. Jump Starter Icons indicate the status of the jump-starting function.
If the clamps aren’t properly connected when the power switch is on, these icons flash, and a warning sound repeats every ten seconds, as detailed in the instruction manual. This alerts the user to correct the connection before attempting a jump start.
Understanding these icons is crucial for safe operation.
Charging the Jump Starter
To charge the Stanley FatMax 1200, locate the designated charging port and connect the provided adapter. Charging time varies, indicated by the unit’s display.
Follow proper charging procedures outlined in the manual to maintain optimal battery health and ensure long-term performance of your jump starter.
Charging Port Location
Locating the charging port on the Stanley FatMax 1200 Jump Starter is crucial for maintaining its readiness. The charging port is typically found on the unit’s front panel, often near the digital display and power switch.
Refer to the instruction manual for a precise diagram illustrating its exact position, as slight variations may exist depending on the specific model (like the PP1DCS). It’s designed to accommodate a standard AC power adapter.
Ensure the area around the port is clean and free of debris before connecting the charger to prevent any connection issues. Proper connection is vital for efficient charging.
Charging Time and Indicators
Charging time for the Stanley FatMax 1200 Jump Starter varies depending on the discharge level. A fully depleted battery typically requires several hours to reach a full charge – consult the manual for specific estimates.
The unit features visual indicators on the digital display to show charging progress. These indicators may include a charging icon and a percentage display of the battery’s current capacity.
Once fully charged, the indicator will typically change, signaling readiness for use. Avoid overcharging to prolong the battery’s lifespan.
Proper Charging Procedures
To charge the Stanley FatMax 1200 Jump Starter, locate the designated charging port. Use the provided charging cable and connect it to a standard AC power outlet. Ensure the power outlet is functioning correctly.
Monitor the digital display for charging indicators. Avoid using the jump starter while it’s charging. Disconnect the charger once the unit reaches full capacity, as indicated by the display.
Regular charging, even when not in use, helps maintain optimal battery health and ensures readiness for emergencies.
Maintenance and Storage
Regularly clean the Stanley FatMax 1200 Jump Starter and inspect cables for damage. Store in a cool, dry place, away from extreme temperatures and moisture.
Proper storage extends the lifespan and ensures reliable performance when needed, as outlined in the official manuals.
Cleaning the Jump Starter
To maintain optimal performance, periodically clean your Stanley FatMax 1200 Jump Starter. Disconnect the unit from any power source before cleaning. Use a slightly damp cloth to wipe down the exterior casing, removing any dirt or debris.
Avoid using harsh chemicals, solvents, or abrasive cleaners, as these can damage the plastic components. Pay particular attention to cleaning the clamp connectors, ensuring they are free from corrosion to maintain a good electrical connection.
Ensure the unit is completely dry before storing or using it again. This simple maintenance step, as recommended in the instruction manual, will help prolong the life of your jump starter.
Storing the Jump Starter
Proper storage is crucial for maintaining the longevity of your Stanley FatMax 1200 Jump Starter. Store the unit in a cool, dry place, away from direct sunlight and extreme temperatures. Avoid storing it in areas with high humidity, which can cause corrosion.
It’s recommended to charge the jump starter periodically, even when not in use, to maintain optimal battery health. Ensure the power switch is in the ‘OFF’ position to prevent accidental activation during storage.
Keep the unit out of reach of children and ensure the cables and clamps are neatly stored to prevent damage, as detailed in the manual.
Cable and Clamp Inspection
Regular inspection of the cables and clamps is vital for safe and effective operation of your Stanley FatMax 1200 Jump Starter. Before each use, carefully examine the cables for any signs of damage, such as cracks, fraying, or exposed wires.
Check the clamps for corrosion or loose connections. Ensure the clamp teeth are clean and sharp for a secure grip on the vehicle’s battery terminals. Damaged cables or clamps should be replaced immediately.
Refer to the manual for guidance on proper maintenance and replacement procedures to ensure continued safety and performance.
Troubleshooting Common Problems
Common issues with the Stanley FatMax 1200 include failing to power on, low battery indications, or a non-functional air compressor—consult the manual for solutions.
Jump Starter Won’t Power On
If the jump starter fails to power on, first ensure it has been adequately charged. A flashing screen with clamp icons and negative signs indicates a potential issue.
The unit emits a 2-second warning sound every 10 seconds when the power switch is on, but clamps aren’t connected – this isn’t a power-on failure, but a warning.
Verify the power switch is firmly in the ‘ON’ position. If still unresponsive, attempt charging the unit for a minimum of 12 hours using the provided charger. A completely discharged battery may require extended charging time.
Consult the full manual (available on ManualsLib) for detailed troubleshooting steps and safety precautions regarding battery operation.
Low Battery Issues
Experiencing low battery performance? The Stanley FatMax 1200 utilizes a digital display showing battery status. A significantly low reading necessitates immediate charging.
Insufficient charge can hinder jump-starting capabilities. Ensure the unit is connected to a power source using the designated charging port. Charging time varies, but a full charge is recommended before use.
Prolonged storage without charging can deeply discharge the battery. If the unit won’t accept a charge, consult the manual for potential recovery procedures or warranty information.
Regular charging maintains optimal performance and extends the lifespan of the jump starter’s internal battery.
Air Compressor Not Working
If the air compressor fails to operate, first verify the unit has sufficient battery charge. Low power significantly impacts compressor function.
Ensure the air hose is securely connected to both the jump starter and the tire valve. Check for any kinks or obstructions within the hose itself.
Confirm the air pressure gauge is reading accurately. A faulty gauge may indicate operation when none is occurring. Inspect the unit for any visible damage.
Refer to the manual for specific troubleshooting steps and potential reset procedures if the compressor remains unresponsive.

Technical Specifications
The Stanley FatMax 1200 delivers 1200 peak amps, provides 120 PSI air compression, and features USB output power for convenient device charging capabilities.
Peak Amperage
The Stanley FatMax 1200 Jump Starter boasts a peak amperage of 1200 amps, providing substantial starting power for a wide range of vehicles, including cars, trucks, and SUVs.
This high peak amperage ensures a reliable jump-start even in challenging conditions, offering a powerful boost to depleted batteries. Manuals confirm this specification, emphasizing its capability for various engine sizes.
However, it’s crucial to remember that sustained amperage will be lower, and the 1200A figure represents the maximum burst available during the jump-starting process.
Air Compressor PSI
The Stanley FatMax 1200 Jump Starter integrates a built-in air compressor capable of delivering up to 120 PSI (pounds per square inch) of air pressure.
This feature allows for convenient tire inflation, sports equipment inflation, and other applications requiring compressed air. Manuals detail the compressor’s functionality, noting its usefulness for maintaining proper tire pressure on the go.
The compressor is designed for portability and ease of use, offering a practical solution for quick inflation needs without requiring a separate air pump.
USB Output Power
The Stanley FatMax 1200 Jump Starter boasts integrated USB ports – both USB-A and USB-C – providing convenient power for charging portable devices.
Specifically, it delivers 15 watts of power through these ports, enabling quick and efficient charging of smartphones, tablets, and other USB-powered electronics.
This feature transforms the jump starter into a versatile power bank, useful during travel, emergencies, or any situation where access to a wall outlet is limited, as highlighted in product descriptions.

Warranty Information
The Stanley FatMax 1200 Jump Starter is backed by a manufacturer’s warranty, covering defects in materials and workmanship.
Details regarding coverage duration and claim procedures are available in the product manual and on the official Stanley website.
Warranty Coverage Details
The Stanley FatMax 1200 Jump Starter’s warranty typically covers defects in materials and workmanship under normal use for a specified period from the date of purchase.
This coverage generally includes malfunctions of the jump-starting function, the air compressor, and USB charging ports.
However, the warranty does not cover damage resulting from misuse, abuse, accidents, unauthorized modifications, or failure to follow the instructions in the manual.
Normal wear and tear, battery degradation, and damage caused by lead-acid battery issues are also typically excluded from warranty coverage. Proof of purchase is required for all warranty claims.
How to Claim Warranty
To initiate a warranty claim for your Stanley FatMax 1200 Jump Starter, retain your original proof of purchase – a receipt or invoice is essential.
Contact Stanley’s customer service department; details are usually found within the product manual or on their official website.
You may need to provide the model number (J5C09D) and a detailed description of the defect.
Stanley may request you to ship the unit, with shipping costs potentially your responsibility, to an authorized service center for inspection and repair or replacement.
Frequently Asked Questions (FAQ)
Q: What does the flashing clamp icon mean? A: It indicates the clamps aren’t properly connected, or the unit is in standby mode. Ensure a secure connection.
Q: Why won’t my jump starter power on? A: Check the battery charge; it may require charging. Also, verify the power switch is fully engaged.
Q: Can I use this for more than jump-starting? A: Yes, it features a 120 PSI air compressor and USB ports for charging devices.
Q: Where can I find the full manual? A: Download it from ManualsLib or check Stanley’s official website for the latest version.